Sumac can record payment information, and process credit card payments instantly. For example, you may want to use Sumac to process payments for donations, membership fees, or registrations. In order for Sumac to process payments, you must first open a merchant account with one of Sumac's supported payment processors: iATS or Stripe.
This article describes how to set up your integration with our payment partner Stripe.
Setting up your Stripe integration
When your merchant account is opened, Stripe provides you with a list of account numbers, IDs and passwords. Some of them are for logging into your Stripe account. Others are used to configure a card swipe machine (if you've got one). Finally, others are for telling Sumac how to connect and process payment transactions.
Sumac requires your Stripe Account ID, and the currency you intend to use with your Stripe account (either CAD or USD). Once you’ve retrieved these details, your Sumac Administrator must enter this information into your database.
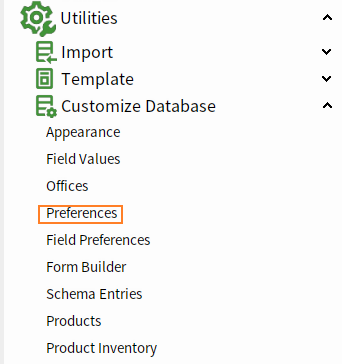
First, from your main Sumac console, expand Utilities > Customize Database > Preferences.
Go to the Payments tab. Open the “Payment Processor Name” drop-down menu and select “Stripe.” Sumac will fill in Stripe's website details for you. Next, in the Payment Processor Account ID field, enter your Stripe Account ID. In the Payment Processor Currency field, enter the correct currency to use with your Stripe account (i.e. either CAD or USD).
The Payments tab provides a few other preferences you may want to consider using. For example, if you wan to make Account Codes mandatory in payment records, put a check mark next to "Account Codes are mandatory in payment records."
One other option on this page is occasionally necessary for payment processing. When a payment processor requires address verification for processing credit cards, Sumac normally uses the contact's preferred address – either their residence or business address. If you want to force Sumac to always use the residence address, put a check mark next to "Use residence address."
Once you have completed the steps above, click OK to save these changes, then restart Sumac to ensure all these changes take effect. Now Sumac is configured to process payments!
Testing your Stripe integration
At this point, it's a good idea to test processing a payment to ensure that everything works properly. In your Sumac console, expand "Financial" and click "Payments." Click "New" to add a new Payment record.
Choose a contact to test with, then enter an amount for this payment.
Choose a Payment Type that applies to a credit card (e.g. Visa). Then enter a credit card number, expiry month and year, verification, and the name for the credit card. When done, click "Process" to test processing this payment.

You should not use a real credit card number, as it may process a payment on that credit card. We suggest using a credit card number designated for testing purposes. Stripe may provide you with test account numbers and transactions so that you can confirm that credit card processing is working properly.
Sumac should give you an error message saying that the credit card information cannot be authenticated. This is a good sign! It means that Sumac is correctly set up for processing payments. It was able to send the credit card information to Stripe and receive Stripe's response.

Any time a payment is not processed successfully, Sumac receives the error message from Stripe and displays it in the payment record.
When a payment is processed successfully, then the authorization code is filled in, and the transaction is closed and saved to the database.
Considerations for web integration
If you are integrating Sumac with your website for online donations or membership renewals, it's a good idea to confirm that the Payment Types you have set up are using the correct Payment Processor Code for Stripe.
Note: the Payment Processor Code comes built into Sumac. In nearly all cases, you do not need to adjust anything for your Payment Types.
However, if you would like to double-check, need to make adjustments, or if you're setting up a brand new Payment Type that was not built into Sumac, follow the steps below.
- From your Sumac console, expand Utilities > Customize Database > Field Values. Choose the Area: Payments, then choose the Field: Payment Types.
- Double-click an existing credit card Payment Type, and review the information in the Payment Processor Code field.
- If you notice a change is needed, make the necessary change to the Payment Processor Code as defined by Stripe, and click OK to save it.