How to Export
Sumac lets you export information from any list in just a few clicks. First, decide which records you want to export. You can use any available searching techniques to produce the list of records to be exported.
For this example, let’s imagine we just want to export information about a few selected records. After you have chosen the records, click Export.
Sumac gives you the option of exporting all the records showing in your list, or just the selected ones. Click “Selected” to export information about the chosen records.
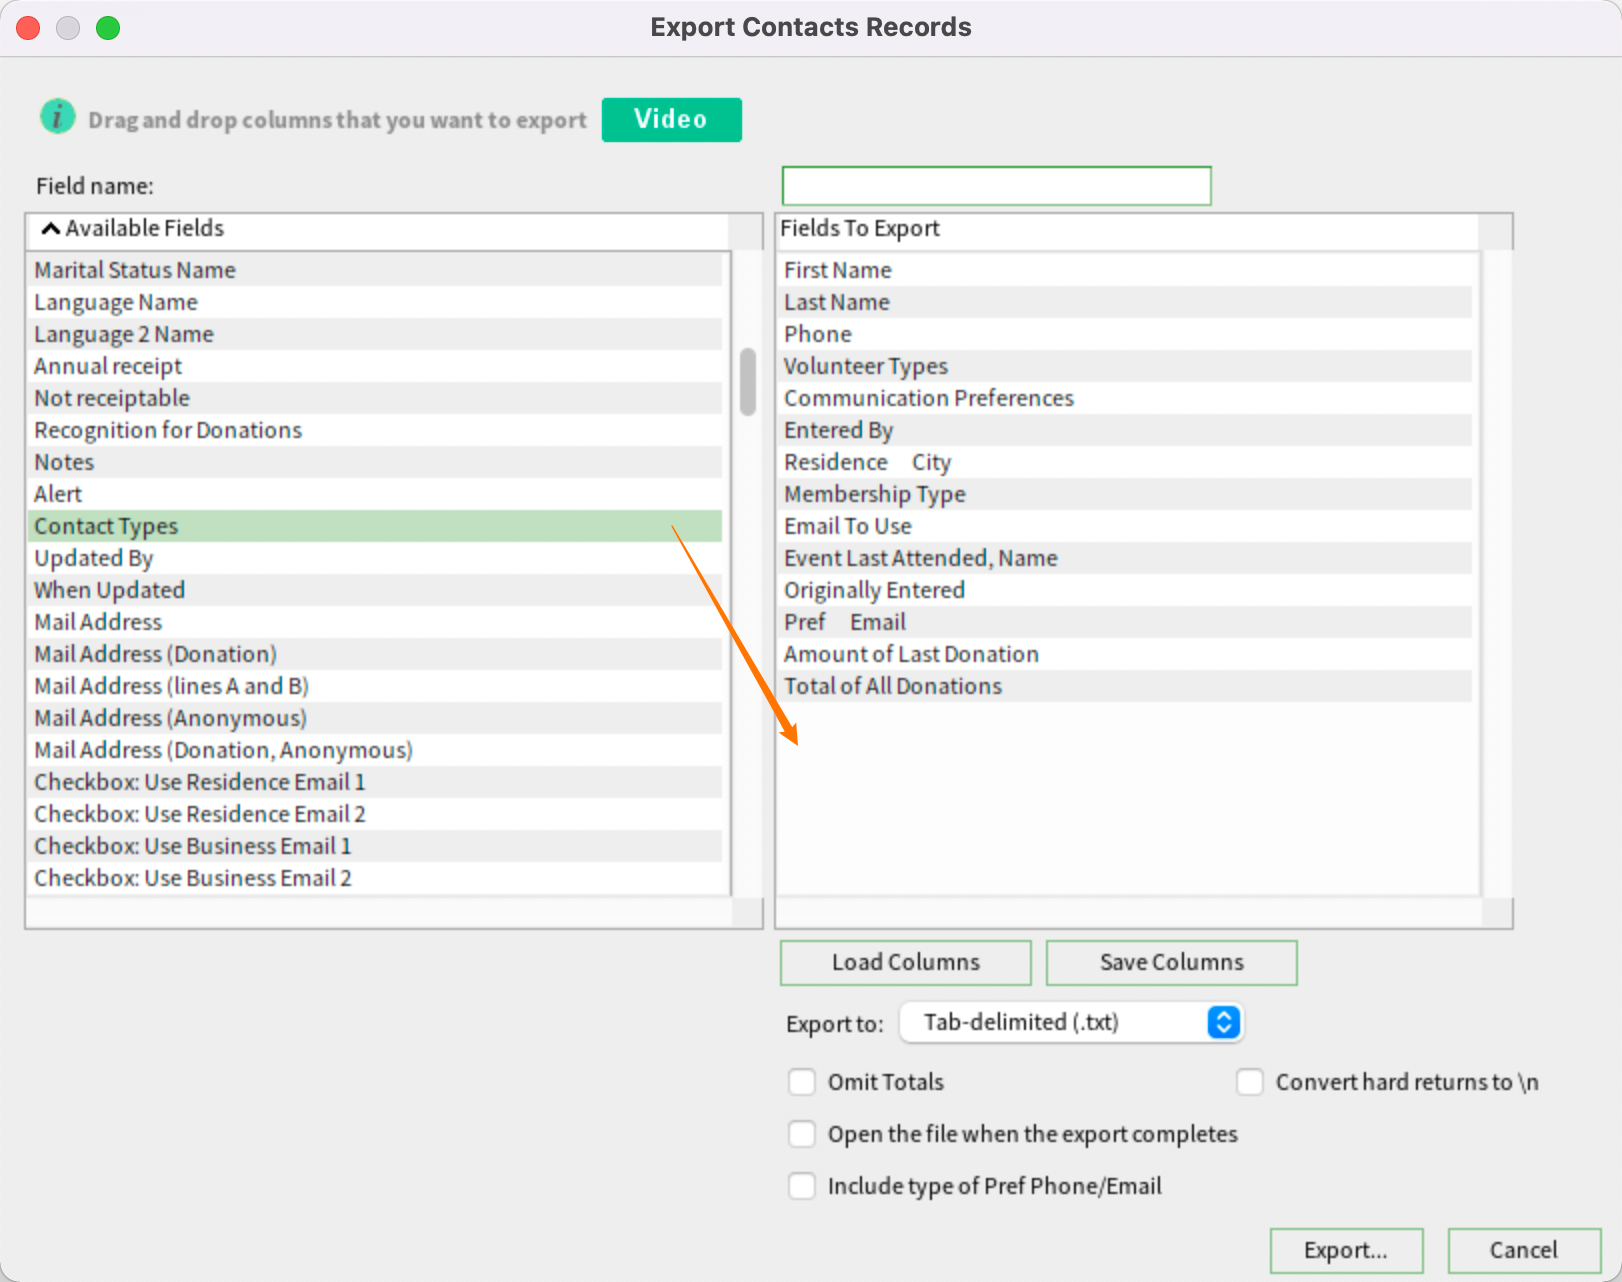
The list on the left is all the available fields. Drag and drop fields that you want to export into the fields to export list. This is what Sumac will put into the output file, one field per column.

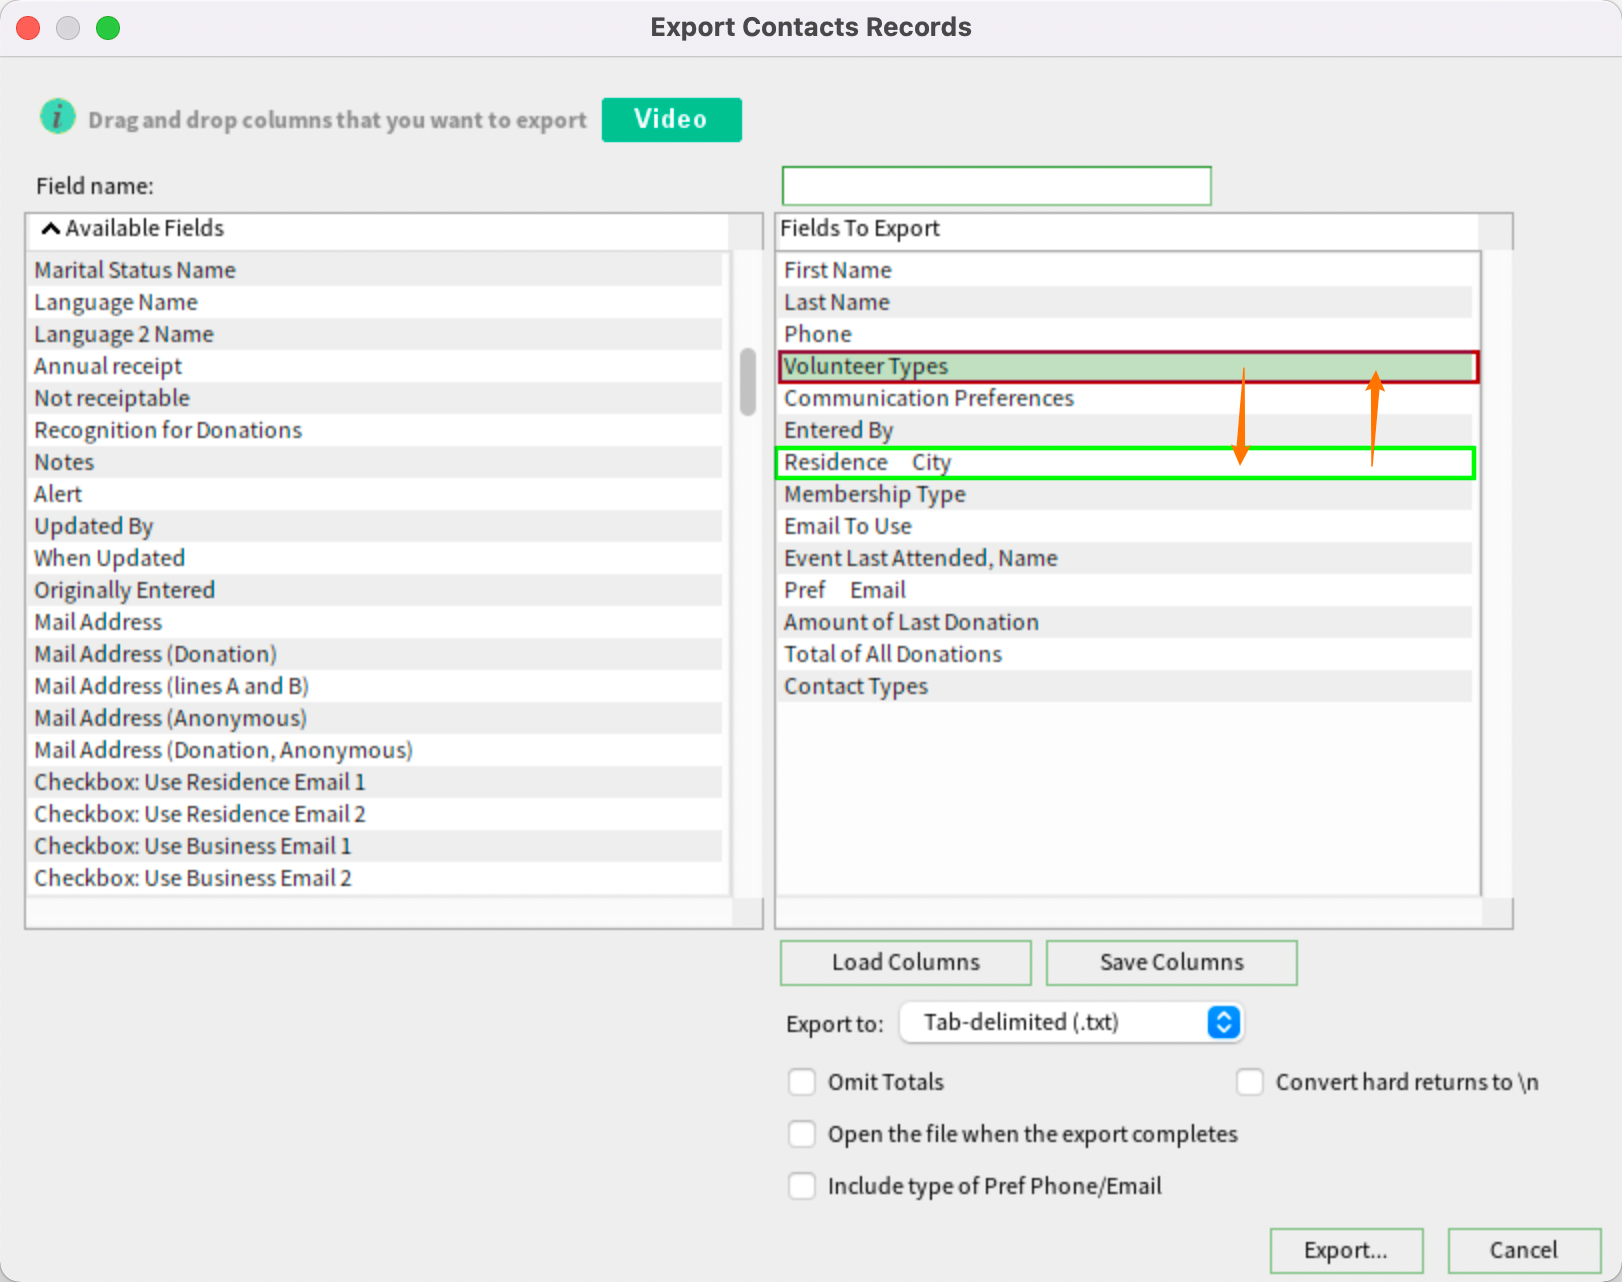
If you want to exclude any of the chosen fields, drag them away from your fields to be exported list to the list on the left.
If you want columns to appear in a different order in the output file, drag them up or down in the list of fields to export.

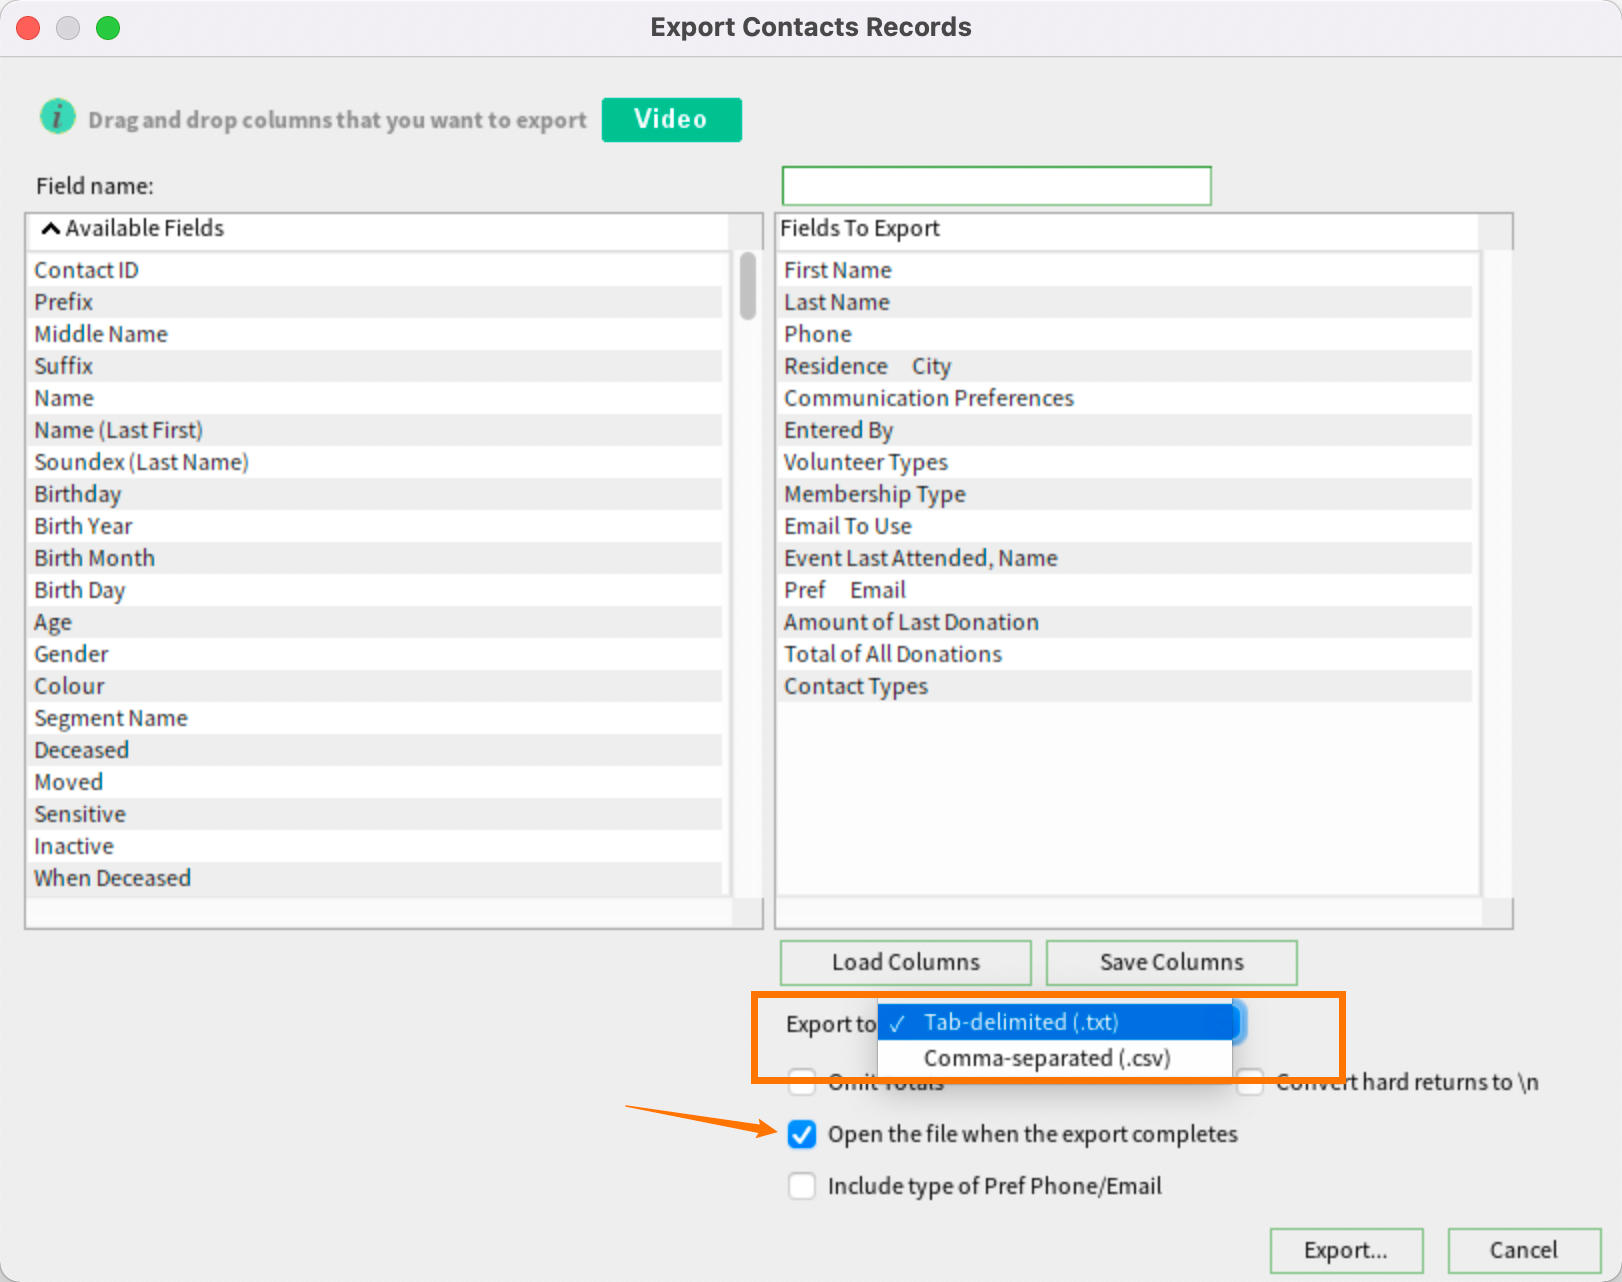
You can also specify either a tab-delimited text file or a csv file. If you check the box to open the file once the export is completed, the exported data file will open immediately after being created.

When you click Export, Sumac asks you where you want to save the file.
Next Sumac shows you the progress of your export in a window in the bottom right, so you can see when your entire list has been exported and saved.
To open the exported data in a spreadsheet or word processing program, right-click on the file and select the program to open it with. That’s it - the export is complete!